The Torc turns a nearby beam emitter to match the Explorer’s facing. The difficult part is reaching the emitter while facing the correct way: you cannot turn on the spot. Use a green beam to step into a wall and back out, or let the cart move you without changing your facing.
This route covers the four Torc rooms south of the main West hub: three on South 1 West 2 and the last on South 1 West 1. The route below follows the chambers and the connecting courtyard in that order. The gold block near the courtyard is a separate later-game task; reaching it does not mean you can collect it yet.
Read the beam and your facing together
A gem in a socket powers the emitters in its block. Removing it switches them off. In these rooms, green enables wall passage and cyan supplies pushing power. A cyan emitter can help move itself when you turn it so its beam reaches the Explorer.
There are two separate questions before every Torc use: where should the beam point, and how will you arrive beside the emitter facing that way? Plan the last movement into position before moving the emitter. A cart push preserves your facing; ordinary walking changes it.
One cyan beam lets the Explorer push one stone. Overlapping two cyan beams supplies the stronger push needed for a line of stones. The final chamber depends on that distinction. These rules and the four-room route are demonstrated in 塞德莎’s Torc recording.
First room: turn the far-left green emitter right
You receive the Torc in this room. The destination lies behind the wall at the bottom right. The far-left emitter needs to fire right to provide the final crossing, but simply walking around it will not give you the facing you need.
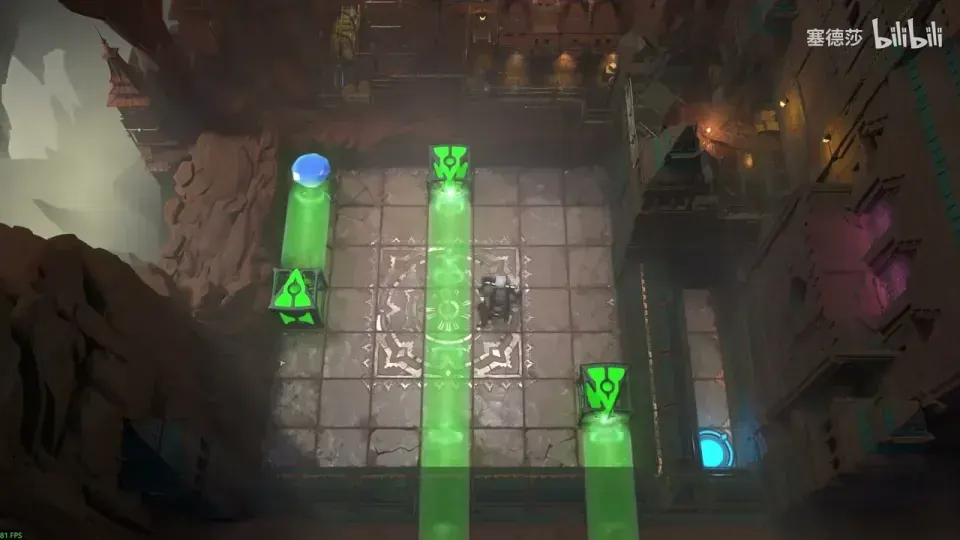
Use a second green beam to set your facing before turning the far-left emitter. Gameplay frame from 塞德莎’s recorded walkthrough.
- Power the green emitters. Use the other beams to create a temporary wall passage rather than trying to turn the far-left emitter immediately.
- Set one emitter upward and another rightward. Step into the illuminated wall and back out to arrive facing left.
- Use that facing to turn the bottom-right emitter left.
- Enter the wall along this new green beam, then step back out facing right.
- Turn the far-left emitter right and follow its beam through the wall to the destination.
The temporary beams solve the facing problem; they are not all part of the final exit alignment. If the far-left emitter keeps turning the wrong way, undo to the movement that set your facing. The first-room explanation shows the intermediate wall steps.
Second room: carry the cyan emitter with the cart
The cyan beam must reach the stone inside the right-hand section. Moving the emitter directly is not enough: use the cart to take it downward, then use another cart push to arrive facing up for the final turn.
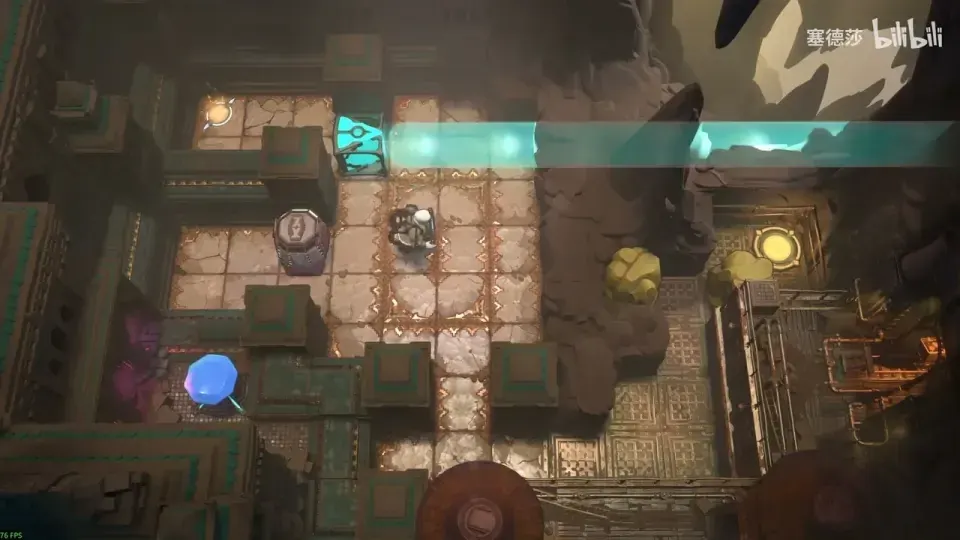
Keep the cyan emitter facing left while the cart carries it downward. Gameplay frame from 塞德莎’s recorded walkthrough.
- Turn the cyan emitter downward and push the cart out. Turn it left to clear the next obstruction, then turn it upward to continue the setup.
- Move the cart into the column used to transport the emitter. Approach facing right and push the cart into that column.
- Push the emitter into the same column. Keep the emitter pointing left while the cart carries it down; that beam is needed to push it right afterward.
- Face upward before the cart moves you to the bottom position. Being pushed retains that upward facing.
- Use the Torc to turn the emitter upward so cyan reaches inside and lets you move the blocking stone.
If the emitter arrives but you cannot move it right, check its direction before rearranging the cart. The second-room recording provides the exact notch and cart alignment.
Courtyard: clear the bottom-left approach
Solving the second room releases a green emitter outside. Its beam needs to reach the bottom-left passage, but the middle stone blocks that route.
Push the middle stone left first. Move the green emitter one tile right and then down, use the wall passage to push the next stone left, and return upward. Turn the emitter down and push it left into alignment. When you pass upward through the wall, move the obstructing piece up one tile so you retain room for the later wall step.
This is a connecting puzzle, so compare the courtyard rather than the previous chamber when following the courtyard sequence.
Third room: preserve right-facing through two cart setups
The exit requires the central green emitter to fire right. The cart supplies the facing you cannot obtain by walking into position. Prepare the cyan emitters first, so the cart can reach its final job.
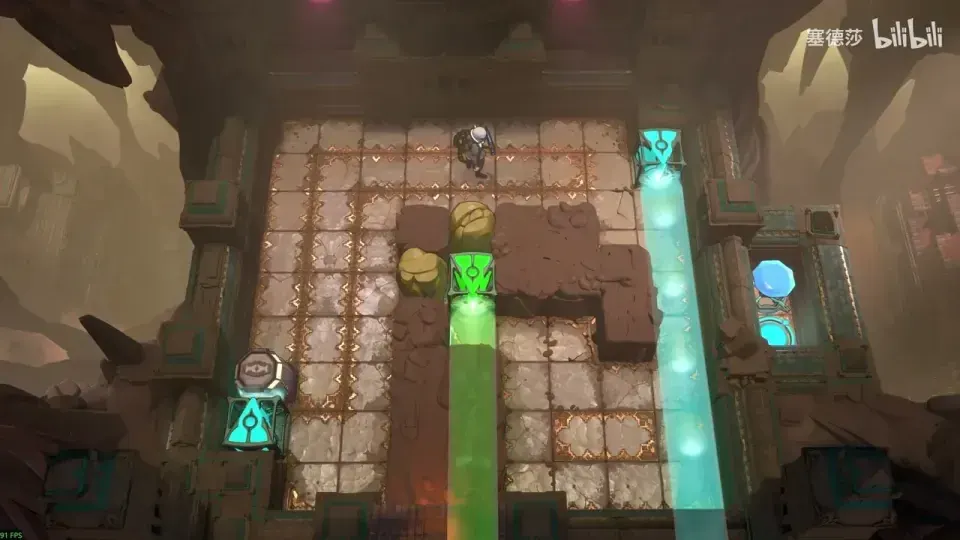
The cart carries your facing into the position used to turn the green emitter. Gameplay frame from 塞德莎’s recorded walkthrough.
- Face right and let the cart carry you into position to turn the bottom-left cyan emitter right. This supplies the push needed to move the cart upward.
- Move the cart all the way up. While the left cyan emitter is still accessible, arrange the right-facing turn needed for the later push.
- Turn the upper-right cyan emitter left. Move it down one tile, turn it downward, and move it to the bottom row before pushing it upward.
- With the cart in place, face right and use its push to reach the green emitter. Turn that emitter right and take the wall passage.
The last movement has a short timing window in the recorded solution. If you arrive facing incorrectly, repeat the cart setup rather than walking an extra step beside the emitter. Watch the slow final turn for the input order.
After the courtyard’s bottom-right cage opens, turn the green emitter right from its starting position to reach that corner. Leave the gold block for the later-game equipment it requires; this guide does not establish its collection route.
Fourth room: prepare the double-cyan push before releasing the cart
On South 1 West 1, the cart has one useful pass that pushes the cyan emitter out. Prepare the bottom-row beam before removing the gem that is stopping the cart.
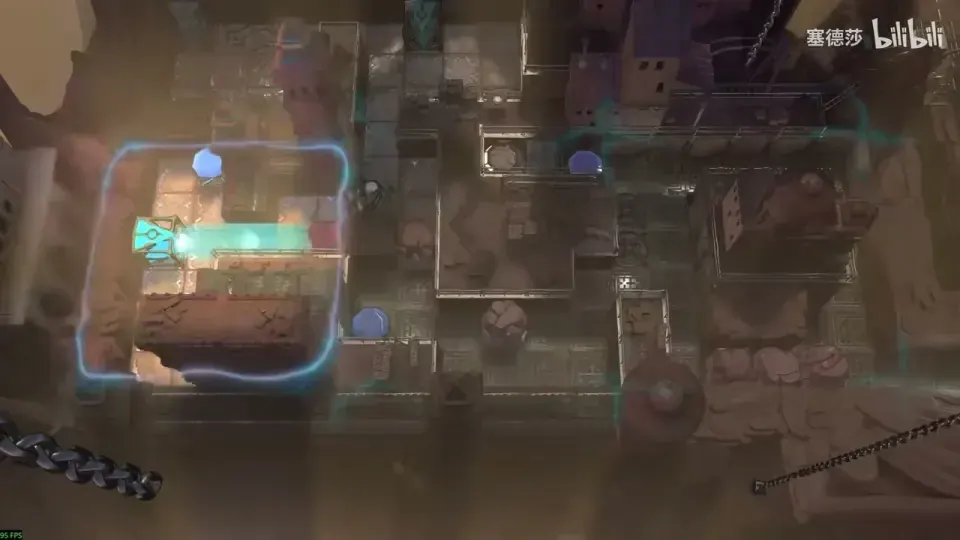
Set the bottom-row beam before freeing the cart. Gameplay frame from 塞德莎’s recorded walkthrough.
- Use the first gem to power the beam and clear the first stone, then retrieve it.
- Reach the next stone with a beam from above, push it down, and collect the second gem.
- Use the upper-left beam to move a cyan emitter into the row that must move right. Reposition the gem to clear the next stone.
- Power the second cyan beam so it overlaps the first. Use both beams for the stacked stones, then recover the gem.
- Set up the bottom row: power the upper-left beam, move its emitter down to the row containing the three stones, and light it.
- Pick up the right-hand gem that is blocking the cart. The cart cannot push the gem, so removing it releases the cart and pushes the other cyan emitter out.
- Place the gem on that beam’s socket, follow the cart, and push the three stones right to open the cage.
The critical checkpoint is before step 6. Once the cart reaches the end, it cannot return the emitter to repeat that same push. If you released it before preparing the bottom row, undo to the release and rebuild the beam first. The final-room setup and release shows when the second beam must be ready.
Related guides
- Beamcasters Level 1 for the early beam rooms.
- Reflected Beams for Torc interactions with mirrors.
- Puzzle hints for help that reveals less of the solution.