In Reflected Beams, check the mirror’s active block before changing the whole beam route: the Trader must stand inside that block to trigger it, even when the object being reflected is far away. Then work backward from the exit. Some rooms need a landing tile or a stone bridge; reflecting the hero directly toward the goal will not solve them.
This guide covers recognizable room layouts, their key solution conditions, and matching recorded demonstrations. Reflected Beams combines Mirror Isles mirrors with Vault of the Beamcasters emitters. Video chapter numbers vary because one recording includes the MxB Gold Room first; match the layout and clip rather than treating a video number as an official room label. The crystal-cart section contains post-game spoilers.
Match the failure to the rule
| What is going wrong | Check before moving anything else |
|---|---|
| A nearby mirror does nothing | Stand inside its glowing block, rather than beside it outside the block. |
| A mirror blocks a red beam | A Trader mirror can redirect the beam as well as reflect the hero; it can replace a dark beam mirror in a combined setup. |
| Purple takes you past the intended landing | Identify what stops the beam. A gem or mirror can deliberately set its endpoint. |
| A cart stops moving a stack | The ordinary cart pushes one object; two objects together stop it. |
| Green does not cross a fence | Green permits wall passage, but a fence needs another route. |
| The Explorer reaches an emitter facing incorrectly | Walking sets facing, while a reflection changes it; plan the arrival direction before using the Torc. |
These interactions are shown room by room in 塞德莎’s east–west crossover recording and its lower-area continuation. The routes below describe demonstrated solutions rather than every possible solution.
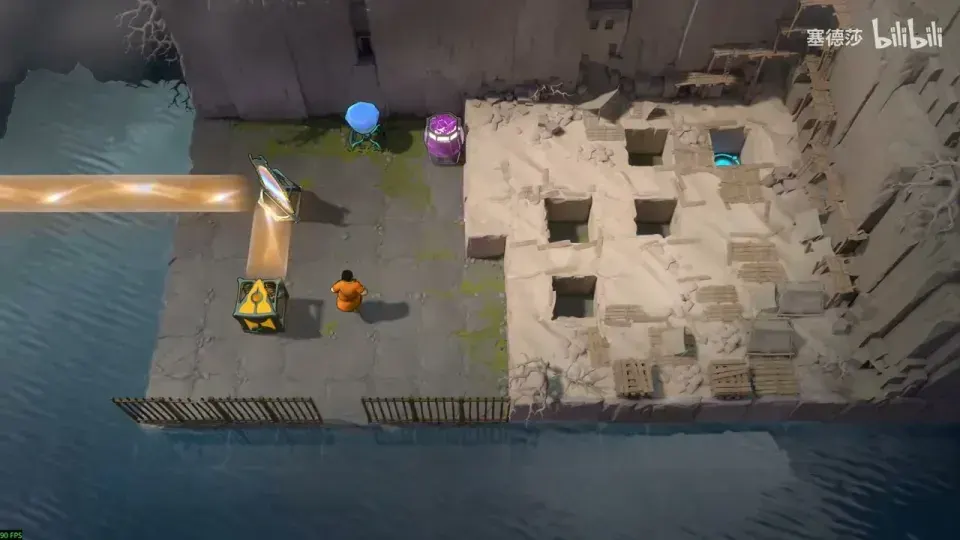
Crystal beside a blue mirror block: activation range
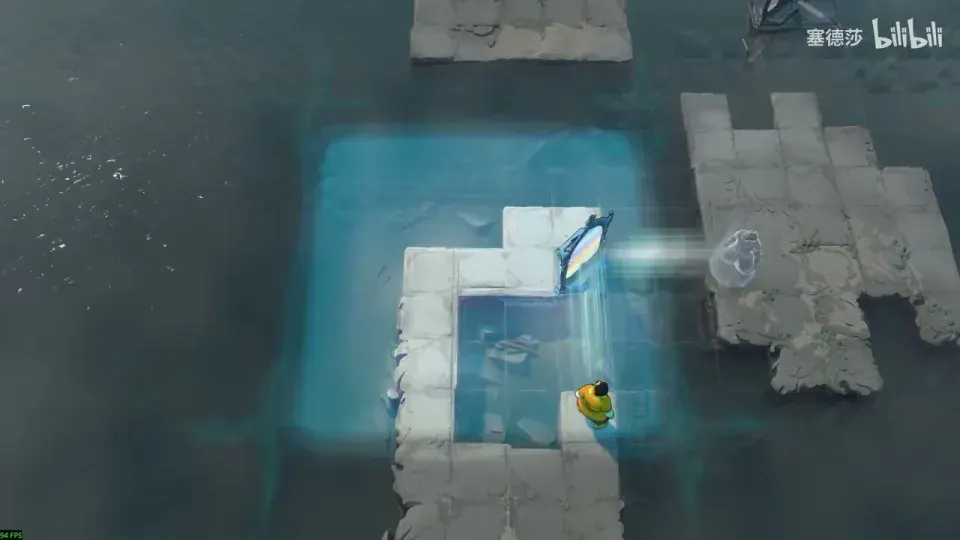
Activate the mirror from within its block; its reflected objects can lie farther away. Gameplay frame from 塞德莎’s recorded walkthrough.
The first task is to make a crossing with the crystal. Activate the upper mirror while standing inside its block, reflect the crystal into line with the left mirror, and use that second mirror to move it again. Distance from the crystal does not prevent the reflection once you are in the correct activation block.
After the crystal fills the hole, move the mirror up and reflect across. The remaining gap needs a stone. Instead of reflecting from the obvious position that leaves you below the stone, use the tile one step right along the edge that is still inside the mirror’s block. A reflected crystal creates the approach from which you can get behind the stone and push it upward.
See the activation-range demonstration and last-gap setup. A mirror being close to the hero is not sufficient by itself.
Two red doors below three mirrors: give one mirror two jobs
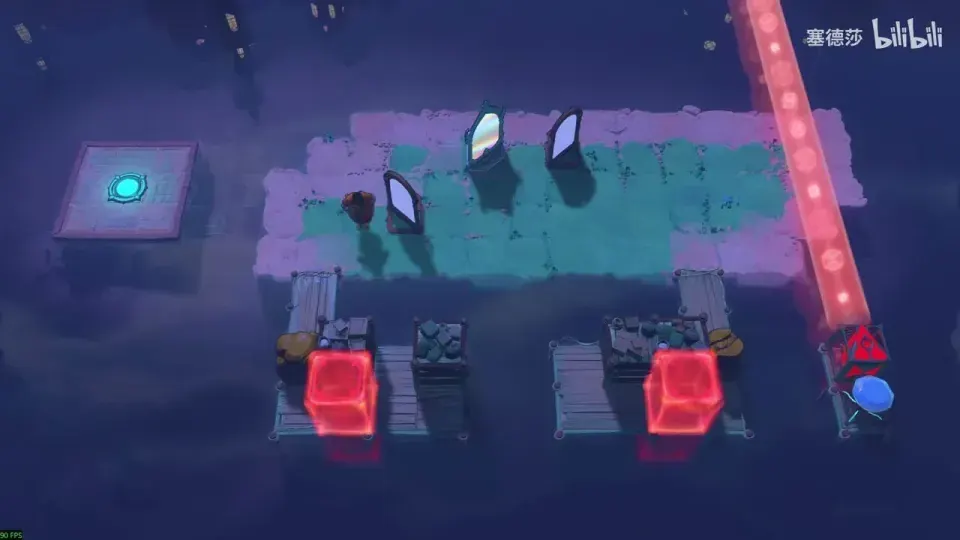
A Trader mirror can redirect a beam and reflect a hero in the same setup. Gameplay frame from 塞德莎’s recorded walkthrough.
Open the right-hand door by redirecting red to the tile beside it with the dark beam mirrors. Put the Trader mirror where it can reflect you into the opened section, then push the stone back out.
The left-hand door exposes the trap: placing the Trader mirror for your reflection can cut off the red beam. Replace a dark beam mirror with the Trader mirror so it performs both jobs at once. It redirects red toward the door while providing the reflection that takes you inside. The combined-mirror demonstration shows this substitution.
For the larger red-door mazes, retain access to the mirror positions you need later. A position that opens the next door can still strand a mirror or block your own entry. The wrapping maze also permits travel across opposite screen edges; do not read its borders as solid walls.
Yellow emitter behind a field of stones: save a fifth bridge piece
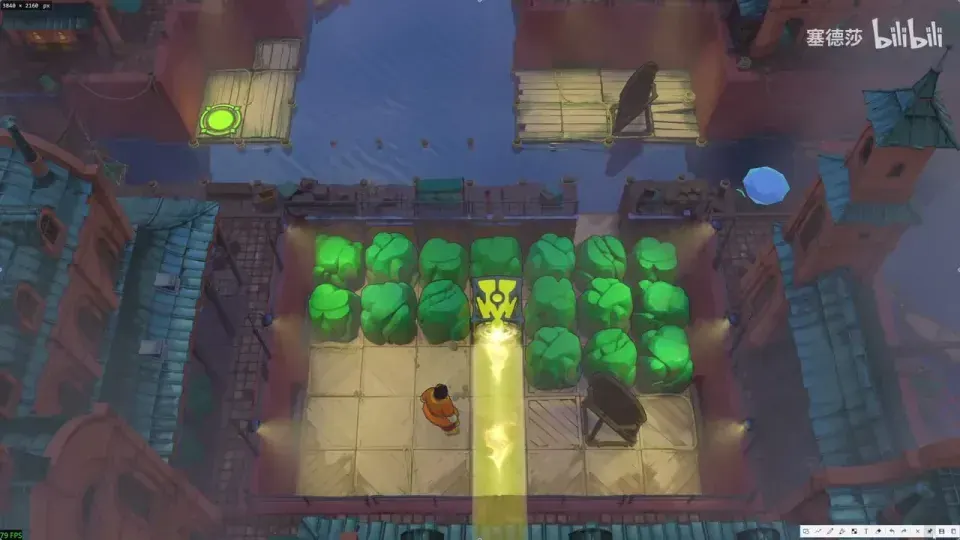
Keep the stones needed for the crossing; the emitter also fills a water tile in this route. Gameplay frame from 塞德莎’s recorded walkthrough.
This crossing needs five filled water tiles, but the demonstrated route frees only four stones. The yellow emitter itself supplies the remaining tile. Destroying every inconvenient stone is therefore the wrong objective: retain the stone to the emitter’s right so you can release the emitter later.
First free the up-left mirror with the available stones. Use yellow to remove stones trapped against walls, then redirect it to clear access to the movable pieces. Once the four bridge stones are available, push the emitter into the water as the fifth piece and complete the crossing.
Follow the yellow-emitter bridge recording if your available stones no longer match the required crossing. Undo unnecessary destruction before rebuilding the beam path.
Purple beam between islands: transport stones instead of the hero
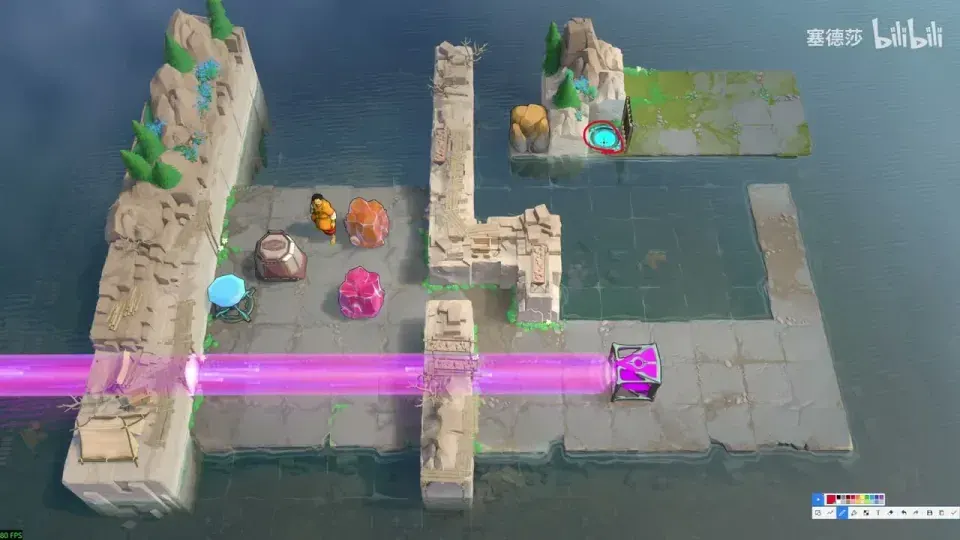
Purple can transport a stone pushed sideways into its path. Gameplay frame from 塞德莎’s recorded walkthrough.
The exit approach needs two water tiles filled. Directly riding purple toward it fails because the required emitter position leaves the beam obstructed. Let the cart push a stone sideways into purple; the beam carries that stone to its endpoint.
Deliver the first stone, cut the beam, and move the purple emitter onto the planned right-hand water tile to change where the next stone lands. Then deliver the second stone. In the demonstrated route, moving the stone all the way to the edge before activating the delivery avoids the tight timing of switching on purple immediately before the cart pushes.
The stone-delivery explanation distinguishes the bridge from the tempting direct teleport. Another later room does require coordinating a delivery with the cart moving a crystal; that timing belongs to its own layout.
Find the other recorded layouts
These links use The Flying Chungus’s video chapters. The initial chapter is the MxB Gold Room, so the labels here identify layouts rather than assigning a new site-wide puzzle number.
| Recognize the room | Main condition to solve | Recorded route |
|---|---|---|
| Two mirrors trapped near opposite sides | Free each mirror before positioning the final reflection to the upper-right exit. | Part 1, 2:28 |
| Multiple red doors in separate compartments | Keep the starting reflection position usable for the high door. | Part 1, 4:14 |
| Red-beam maze spanning the screen edges | Move mirrors through openings and use the wrapping edges. | Part 1, 5:40 |
| Purple exit enclosed by a fence | Set a mirror as the beam’s stop beside the exit. | Part 1, 10:57 |
| Green beam through the left of a rocky island | Use wall passage to reach the backs of the awkward mirrors. | Part 1, 11:42 |
| Cart, crystal and purple beam between islands | Coordinate the stone delivery with the cart moving the crystal. | Part 1, 13:02 |
| Large platform beside a distant exit cage | Let the cart shift the mirror while you wait on the upper platform. | Part 1, 13:52 |
| Fenced square containing a cart and purple crystal | Reflect while the cart blocks the beam, keeping the lower stone in place. | Part 1, 14:22 |
| Explorer between two towers, with an isolated exit | Account for the Rod action and reflection occurring on the same recorded input. | Part 2, 0:00 |
| Two Explorer clones and two exits | Block one clone while the other turns, then use their different facings. | Part 2, 0:35 |
| Green emitter below a walled block | Use the Torc to change the green route during the crossing. | Part 2, 1:01 |
The lower rooms use combinations beyond that video index. In the room with three heroes and a fence, purple provides the fence crossing and the green emitter can set its endpoint. In the courtyard with a strange central crystal, the exit is beneath the crystal; arrange cyan so you can move it. The lower-room recording covers these layouts and the later cyan-emitter rearrangements.
Post-game crystal carts and the orange star-room crossing
These are later rooms reached after the first ending through the top-left drop from Double Beam Falling in Antipode High. Their cart behavior is different from an ordinary opaque cart: light passes through a crystal cart, and the cart receives beam powers. In the red-door tutorial, use purple to bring the cart out, cyan to push it down, orange to send it into the inner section, and red to open the door. See the crystal-cart introduction.
The post-game star-room route carries the orange emitter on a reflected crystal cart. Gameplay frame from 塞德莎’s recorded walkthrough.
For the star-room water crossing, the cart must travel horizontally while carrying the upward-facing orange emitter. A Trader mirror reflects the crystal cart and changes its travel axis.
- Switch off the beam while repositioning the cart. Prepare its up–down route on the left so a reflection can send it into the lower water row.
- Activate orange before committing to the crossing; waiting until the cart is already positioned leaves too little time to reach the emitter in this route.
- Reflect the cart while it is moving upward so it enters the water traveling in the required direction.
- Push the emitter upward onto the cart. Follow the moving orange beam rightward to the goal.
Use the star-room cart sequence for the alignment and timing. The neighboring two-cart green crossing also depends on cart timing, but the supplied commentary does not establish a universal timing rule; do not transfer the star-room sequence to that different room.
Related guides
- Mirror Isles for the underlying mirror interactions.
- Beamcasters Level 1 for the earlier beam layouts.
- Puzzle hints for a less revealing starting point.