To enter Heroes and Mirrors, finish the HxM gold room’s two-puzzle sequence, then push the crystal on its golden platform right to form the connecting path. Inside the area, the lower puzzles on the western screen depend on a barrier opened from the neighbouring screen: solve its central monster-and-blue-button room first.
This route covers that dependency and the early pink-button rooms. Match the room layouts below before following moves; it does not claim to solve every room in the region. Directions assume the room’s starting arrangement. A direction without a count means one tile; “to the end” means stop at the obstruction.
Get through the HxM entrance
The HxM approach depends on progress in both The Mirror Isles and The Hearty Heroes of Hauling: a golden mirror must be unlocked on the mirror side and a path cleared on the Heroes side. Reaching the gold room is separate from finishing the sequence that opens the crossover.
After that sequence, look for the newly available crystal on the golden platform. Push it right. The resulting path leads into Heroes and Mirrors, where moving heroes and mirrors share the same puzzles.
For the routes below, “green” identifies the pulling character and “orange” the pushing character, matching their colours in the room. Keep their roles separate when switching: a correct mirror position can still fail if the other character is blocking its reflection line.
Unlock the central blue-button room from the upper-right paths
The room needed to clear the western corridor is initially behind the upper-right pulling puzzles on the adjoining screen. Use this sequence if its entrance is still sealed. It follows the seven-screen walkthrough’s route; the screen numbers in other guides may differ.
First pulling room
- Stand above the mirror and pull it up twice. Move below it, pull it down once, then reflect green.
- Pull left twice and reflect green again.
- Get above the mirror and pull it up four times. Return below it, pull down once, and reflect green.
- Pull left twice and reflect again.
- Move down, right twice, up twice, left to the end, then down. Reflect green.
- Move down to the end and reflect green to reach the teleporter.
Finishing this room releases another mirror in the upper-right alcove. Use that mirror to build the route to the next two rooms: pull it down twice and right twice; pull the left crystal left three times and reflect it into the water. Pull the mirror right once, then pull the remaining crystal left three times and reflect it to finish the crossing.
Room with the blue button and two mirrors
Drag the lower mirror right, up ten tiles, then right six tiles. Pull the second mirror right four tiles and reflect green through the first mirror. Next pull the first mirror down onto the blue button. Stand above it and reflect green again; the route to its teleporter is now available.
Room with several separated platforms
This room opens the central puzzle. The important distinction is between moving a crystal to create a permanent crossing and moving a mirror so green can change platforms.
- Move up twice and left to the end, then reflect green. Pull the upper-left crystal up once and right twice.
- Pull the mirror left three tiles and down to the end, then reflect green. Move green up and reflect the upper-left crystal to create the lower-left approach.
- Pull the mirror down into the broken path between the lower-left and lower-middle platforms. Pull the crystal below that mirror and reflect it.
- Pull the crystal down twice. Pull the mirror right once, reflect green, move green left, then reflect the crystal to complete that crossing. Pull the mirror left three tiles to clear the route.
- Take the lower-middle crystal left to the end, down to the end, left six tiles, then down twice. Move the mirror right twice and up six tiles; reflect the crystal onto the upper-middle platform.
- Bring the mirror to the upper-middle platform, in its second column and third row. Reflect green onto the upper-right platform.
- Pull the crystal down four tiles and reflect it. Reflect green back, then pull the crystal right twice.
- Move the mirror down to the lower-middle platform, back up to the bottom row of the upper-middle platform, and right twice.
- Move green up. Reflect the crystal into the gap between the two right-hand platforms, then reflect green to that position and reach the teleporter.
If a move fails to match, compare the current mirror platform with the preceding step before continuing. This sequence depends on which crossings have already been filled; continuing from a different crystal arrangement changes the route.
Put the monster on the blue button
Look for the small grassy room containing orange, a movable mirror, a monster and a blue button. Its exit sits on a separate platform to the left. This is the central room whose completion clears the corridor to the western screen.
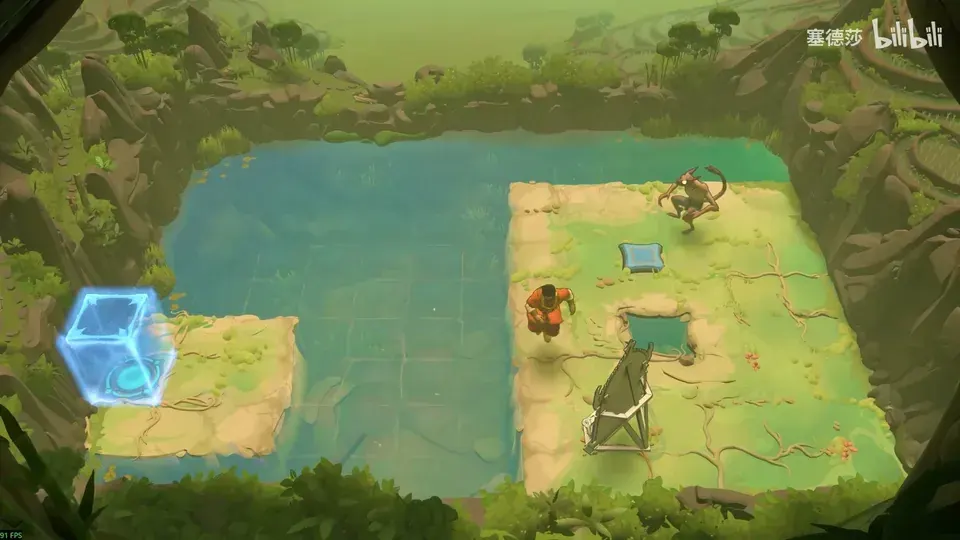
The monster goes onto the blue button before orange reflects to the exit. Gameplay frame from 塞德莎’s recorded walkthrough.
- Move down and right, then reflect orange.
- Push the mirror right twice and up three tiles. Reflect the monster.
- Move the mirror down twice, right once and up twice. Reflect the monster again.
- Push the mirror up once and reflect the monster onto the blue button.
- Move the mirror down four tiles and left to the end. Reflect orange onto the teleporter platform.
The result is a cleared barrier near this room and an open corridor to the neighbouring screen. The monster belongs on the button during the setup; sending orange to the exit before that condition is met does not substitute for it.
Bring the hub mirror into the western screen
Return to the lower-left reset tile on the screen containing the central room. This step resets the local approach used by the following route.
Move its lower-left mirror right to the end, up once, right twice, down six, left twice, then up once. It ends up on the western screen, five tiles right of the blue button. Stand on that button and activate the mirror to open the lower puzzle approaches.
The two room layouts below are different puzzles. Identify the sandy room with pink barrier walls for the first route, or the two separate islands with one hero and mirror each for the second.
Sandy room with two pink barrier walls
Here the same crystal first holds a pink button and later has to leave it. The goal is to change the barrier state at the moment you can use the open route.
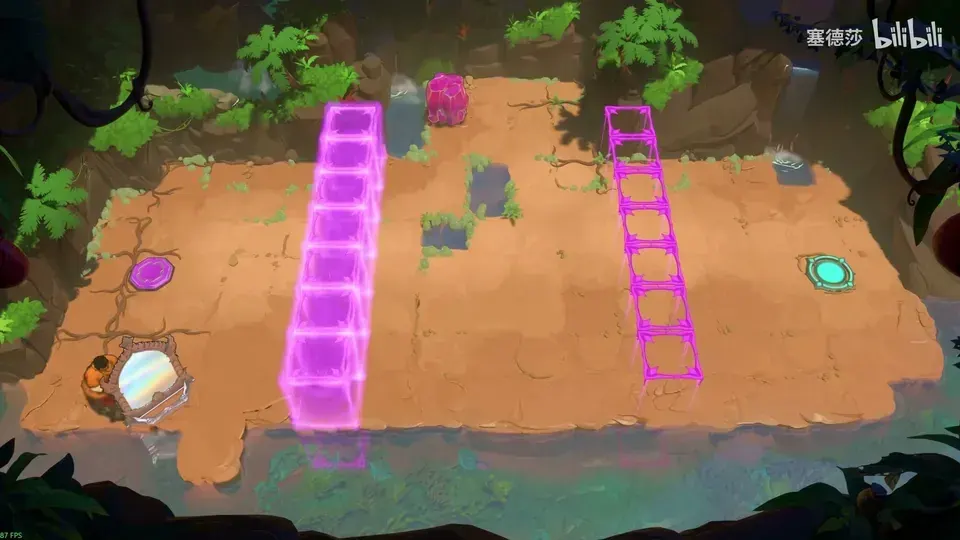
The crystal must leave the button after you pass the first barrier. Gameplay frame from 塞德莎’s recorded walkthrough.
- Push the mirror right twice and get to its right-hand side.
- Activate it, then push it onto the pink button.
- Push the crystal down three tiles.
- Move the mirror up twice and right twice. Stand on the pink button yourself.
- Reflect the crystal across and push it onto the pink button.
- Move the mirror left twice, positioning it above the crystal.
- Pass the first barriers. From beyond them, activate the mirror to remove the crystal from the button, then continue to the teleporter.
Do not treat “leave a crystal on every button” as the final condition. In this layout, taking the crystal off its button is the last barrier change that makes the exit route usable.
Two islands with green and pink buttons
Each character has a mirror and a button. The solution sets up both reflection destinations before activating the mirrors together.
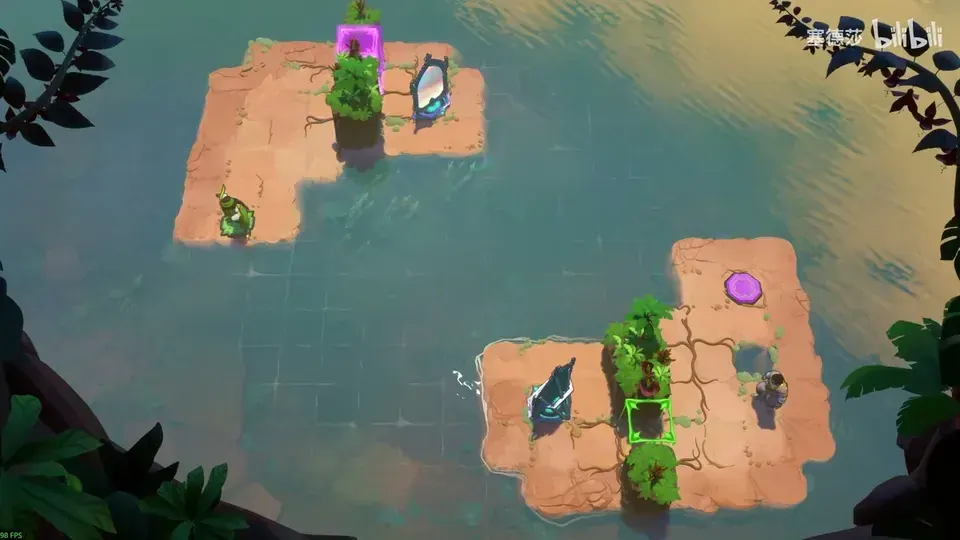
Set both mirrors and occupy both buttons before reflecting the characters. Gameplay frame from 塞德莎’s recorded walkthrough.
- Put green on the green button.
- Switch to orange. Move his mirror down once, then right five tiles into the column containing his pink button.
- Put orange on the pink button.
- Switch to green. Pull her mirror up once, then left five tiles into the column containing the green button.
- Return green to the green button and activate both mirrors. Both characters reach their teleporters.
Completion removes two barriers on the western screen. Keep both characters on their own buttons for the final activation: arranging just one mirror and reflecting immediately leaves the other half of the setup unfinished.
Continue with the matching mechanic
- Use The Mirror Isles guide when reflection geometry is the obstacle before reaching HxM.
- Continue to Stones Illuminated for the separate stones-and-beams crossover.
- Use Reflected Beams for rooms combining mirrors with coloured emitters.