If your Order of the Sinking Star Skipping Stones rocks are stuck, rewind to the last arrangement where the required stones were still accessible. The southern levels connect multiple screens, and a stone spent on a secret detour can leave the main route without a resource it needs. An unusable arrangement is usually a reason to reverse the relevant moves, not to abandon the save.
There is no universal two-stone or three-stone solution for every stuck screen. Identify the land shapes, stone positions, lily pads, and route you were attempting before applying a recovery sequence. This guide explains how to find the move that removed access and uses explicitly identified later Mirrors and Stones arrangements as concrete examples.
Diagnose access rather than counting rocks alone
Count the stones you can actually use, then inspect which side of each one you can reach. A rock can remain visible while being unavailable for the action you need. If you cannot stand in the necessary pushing position, its presence does not automatically make it a usable resource.
Next, separate the place you want the Sailor to reach from the place a stone must reach. The water route can require a stone on a different island, a pad in the current, or a collision that creates a walkable path. Moving a stone toward your own destination does not guarantee that it serves the next interaction.
The first useful question is what changed between the last workable arrangement and the current one. Did a stone leave the screen, become committed to a side route, or land somewhere you cannot push it onward? That identifies an earlier decision worth reversing.
Separate a bad arrangement from an unlearned interaction
A softlock within a puzzle means the current arrangement does not permit the route you are trying to complete. It does not necessarily mean the game or save has failed. Undo and the level or checkpoint restart functions exist to recover from arrangements that no longer work.
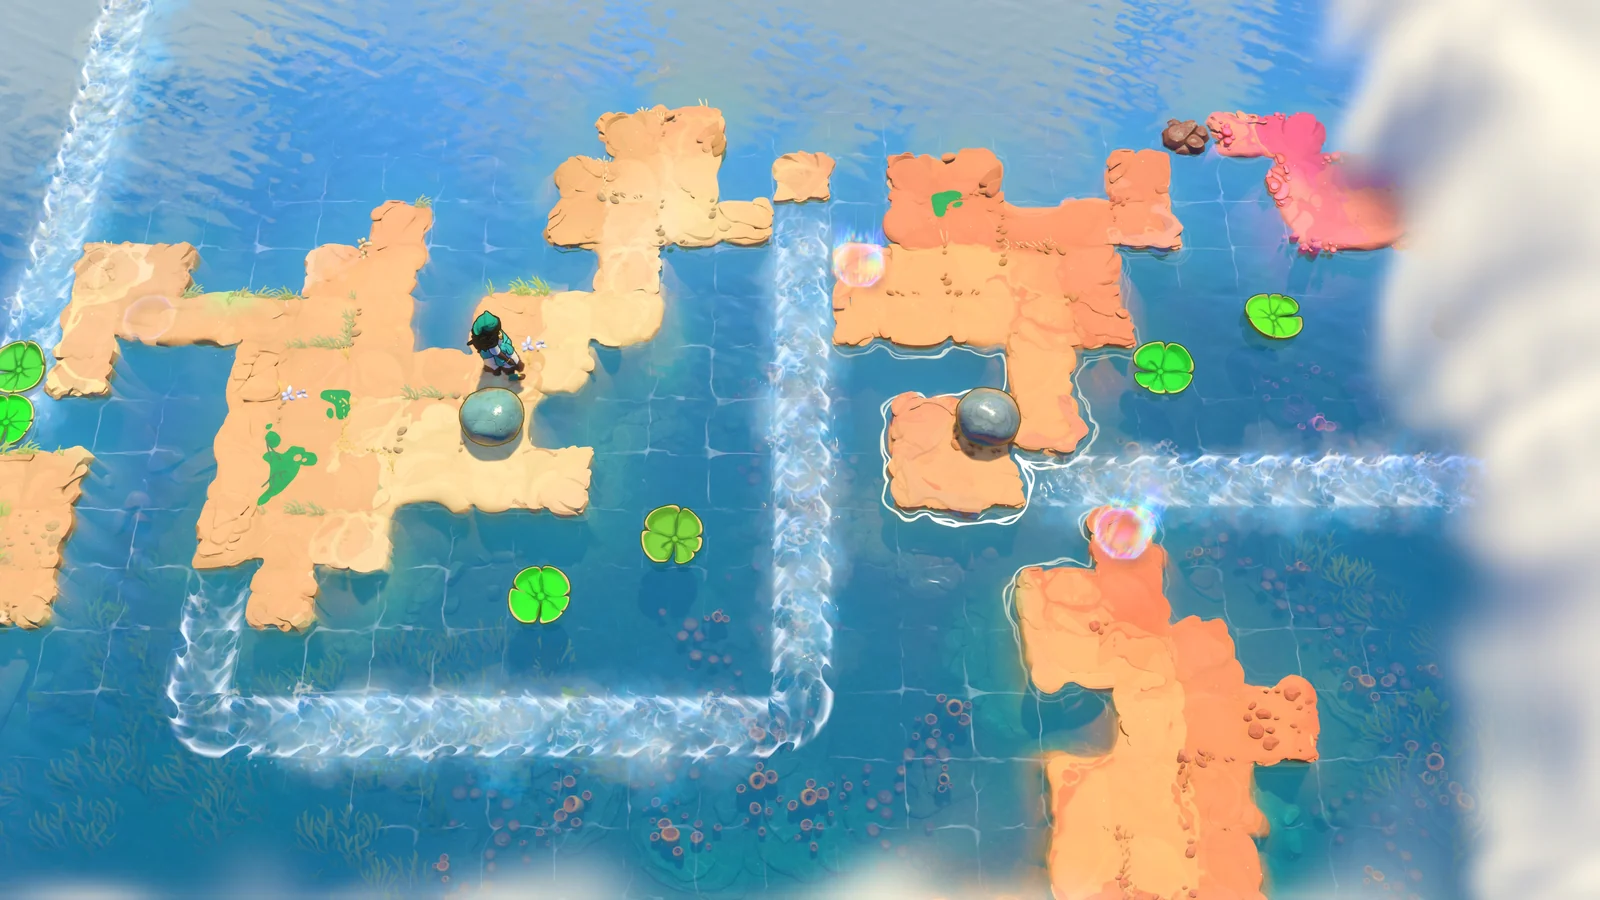
Before rewinding a long section, inspect whether you have misunderstood the stone's role. A stone can skip across water, interact with lily pads, and become part of a path. The visible route may depend on a launch from another side, rather than another object.
However, do not keep rearranging the remaining stones indefinitely if you can identify a necessary stone that you moved away earlier. In that case, the problem is resource access. Recover the earlier arrangement before trying to solve the later crossing.
Use this distinction to choose the next action. An uncertain interaction calls for a small experiment you can undo. A known missing resource calls for rewinding to the move that made it inaccessible. Neither problem is resolved by repeating a familiar push faster.
Recover the last useful arrangement
Use the game's undo function to step backward through the moves that produced the blocked state. Watch the resource you need while doing so, and stop at a point where both the stone and its useful approach are available again.
- Identify the stone or access position required for the next route.
- Recall the detour, launch, or crossing after which that resource became unavailable.
- Undo toward that decision rather than making more moves in the blocked state.
- Inspect the recovered stone and the Sailor's approach to it.
- Choose a different route that preserves the resource needed afterward.
The exact controls depend on your input settings; this guide does not assign an unverified key or button. Use the undo action shown by the game. A checkpoint or level restart is a broader recovery choice, useful when the current chain of actions is no longer a workable starting point.
Leaving a puzzle for the overworld is also different from completing it or restarting it. Do not assume these actions have identical consequences for the current arrangement. If you paused the puzzle and returned, inspect whether the undo history is still available before deciding that you have to reconstruct the whole route.
Preserve stones when investigating secrets
The opening southern area allows detours, and those detours can tempt you to borrow stones needed later. Successfully reaching a secret does not prove that the onward route remains solvable with the resources you left accessible.
Before committing to a detour, identify how you return and which stones must continue along the main path. If a route uses a rock from a later part of the level, consider whether the local arrangement provides an alternative. This is a planning question, not a claim that every secret has the same resource requirement.
If you have already reached the detour and cannot continue, rewind to the point before the imported rocks were committed. Restore the main path first, then reassess the secret with the layout visible. A move that seemed necessary for the detour may have been only one possible approach.
Complete or inspect the normal route before pursuing a complicated side objective when you do not yet understand the level's resource transfers. Knowing where the next stone is needed gives you a concrete constraint for evaluating the detour instead of guessing from the nearest gap.
Return a stone instead of spending it on the first launch
Later mixed puzzles show why a successful stone launch is not necessarily the final use of that resource. In Mirrors and Stones Part 4, Stage 1, the Trader returns a launched stone so the Sailor can use it in another pad adjustment.
The initial arrangement moves the mirror right twice to align it with the skipping stone. Launch the stone, reflect it after it bumps the pad, then have the Trader send it back. The result should keep the rock available for another launch rather than leave it committed to an inaccessible destination.
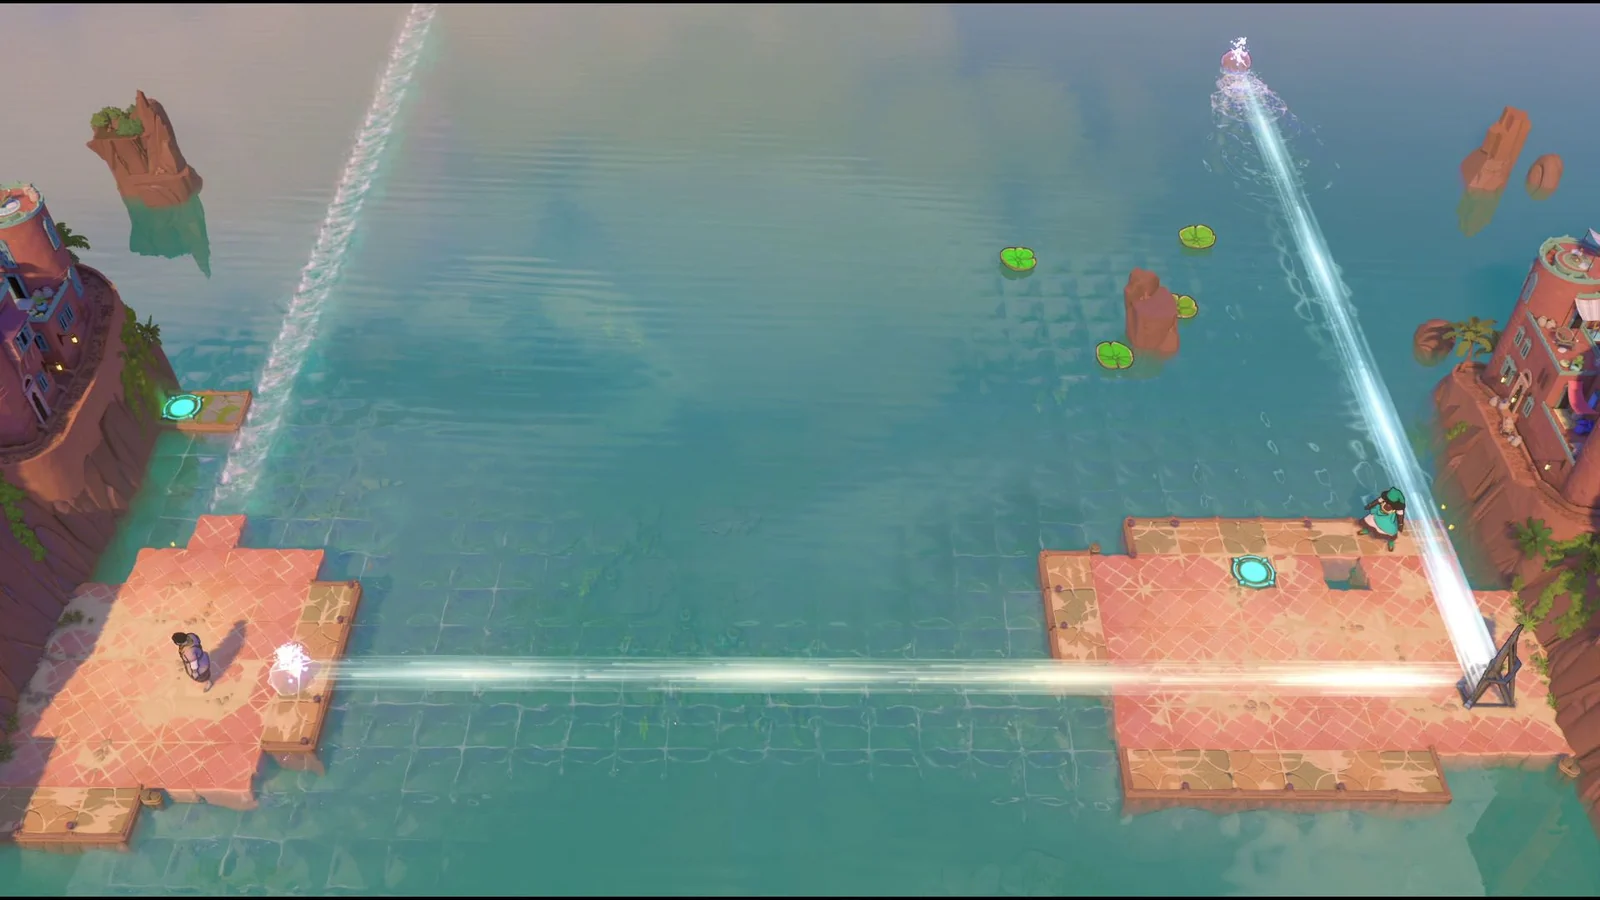
The next pass shifts the mirror left twice and uses a westward launch. Reflect the stone when it clears the platform, then again so the Trader can return it. A later pass places the mirror at the west edge and launches north, using reflections to avoid affecting the first pad while moving the second.
This is a later mixed-area example, not a recovery sequence for every southern screen. It requires the Trader, Sailor, mirror, and pad arrangement described. Its broader lesson is to identify how a resource remains available after it performs the first useful action.
If your attempt leaves the rock somewhere unusable, inspect the return transfer before trying to continue with fewer objects. Undo to a point where the launched rock can reach the Trader and come back. Restoring that relationship is more useful than repeatedly attempting the next launch with a different stone.
Use object positions to establish access across the water
A stone that seems trapped may need another transfer rather than another push from the side you can currently reach. In mixed areas, mirrors provide additional object positions, so inspect the available reflection before assuming the rock must remain on its current island.
Mirrors and Stones Part 4, Stage 3 provides one concrete example. Move the mirror up and left and reflect a skipping stone into the small gap. Move the mirror right and reflect the controlled character so the mirror can be moved south, in line with the third stone.
Reflect that third stone to create another bridge. Then bring the mirror to the end of the dock and reflect the stone needed to complete the Trader's path. Each transfer establishes the position that makes the next part of the arrangement usable.
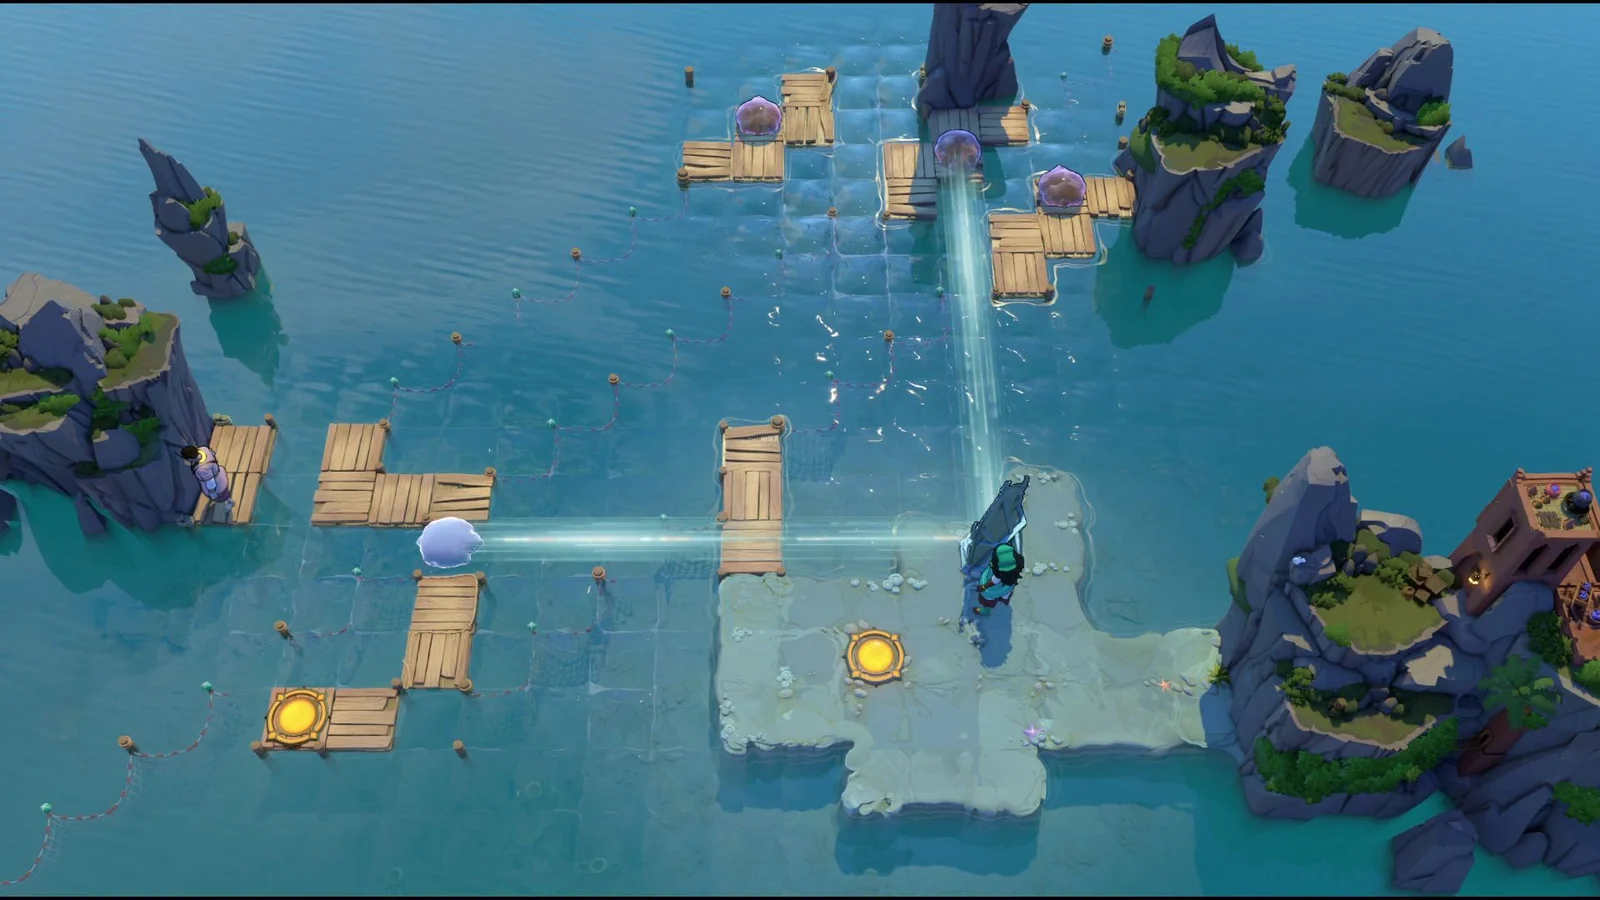
Check the resulting access after each transfer. A stone in the intended gap is an intermediate result; the character still needs a route to the next useful side of the mirror. If the object transfer succeeds but you cannot reposition the mirror, recover the previous state and inspect the character transfer.
For a room without mirrors, this sequence is inapplicable. Use it as an example of how a second system can change resource access, not as a claim that every stuck rock has a reflection-based recovery. The objects and controlled characters in your actual room determine which actions are available.
Check the last transfer before solving the current screen
The southern area's connected layout allows stones to move between islands and screens. If a new section appears short of resources, inspect the arrangement from which you arrived. A necessary stone may still be on an earlier island, or may have been committed to a detour before reaching its next useful position.
Work backward from the first missing resource, not from the place where you finally noticed that progress had stopped. A crossing can succeed for the Sailor while leaving the rock needed for the following action unavailable. Repeating the later screen's pushes cannot correct that earlier transfer.
Before rewinding a long sequence, identify what the stone needs to do next and the side from which you would interact with it. A visible rock is not useful merely because it is close. You need access to the proper approach and a destination that supports the onward route.
Recover the smallest earlier arrangement that restores both conditions. Keep the route that already works if possible, but reverse further when the resource was committed earlier. The purpose is to regain an actionable stone, not simply return every object to a familiar-looking position.
Distinguish rock placement from lily-pad timing
If the rock is in the correct launching position but a moving pad passes before you can board, the problem is timing. Keep the setup and use slowed time while repeating the crossing. If the pad moves in the wrong direction or never enters the required current, inspect the stone's path and the water arrangement.
A stone carried on a lily pad can also be part of a later action. Do not assume every rock you see afloat is stuck beyond use. Identify the reachable pad and the position from which the Sailor would interact with the stone. Then compare that setup with the specific screen's route.
Avoid mixing these problems together. Changing the launch position and the boarding moment simultaneously makes it harder to understand which adjustment helped. Reverse to a state you can read, fix the spatial arrangement first, and then work on the timing.
Resume with the onward route still available
After recovering an accessible stone, decide what it must do next before spending it again. The useful result is not simply “the rock can move.” It is a stone positioned so the Sailor can perform the launch, collision, or transfer required for the continuing route.
Inspect the next screen, checkpoint, or known crossing condition, then preserve the object access that condition requires. When you try another detour, check the return route before committing the stones. If the experiment fails, undo to the useful state and retain what you learned about the arrangement.
For an unidentified secret, a screenshot and its visible geometry are necessary before anyone can give a reliable exact sequence. Until the layout is matched, use the recovery method here: locate the missing resource, reverse the move that removed access, and rebuild a route that keeps the next stone available.